

How can I set up USB Debugging in AirDroid Business for efficient debugging?
USB Debugging Policy is an MDM Policy that allows or disables users to connect USB to enable USB debugging.
In this article, we will explain to you what the USB Debugging Policy is and guide you through setting up USB Debugging Policy in AirDroid Business.
1What is USB Debugging Policy in AirDroid Business?
What is USB Debugging?
USB Debugging is a developer option that allows an Android device to communicate with a computer running Android's Software Development Kit (SDK) for advanced operations such as app development and system-level troubleshooting.
What is USB Debugging Policy in AirDroid Business?
USB Debugging Policy is a MDM Policy feature provided by AirDroid Business that can be set to either allow or disallow the use of USB Debugging on the Android devices.
● If the policy is set to disallow USB Debugging, users will not be able to enable this feature on their devices. This is often used in enterprise or educational settings to increase device security, as enabling USB Debugging can potentially expose the device to security risks.
● If the policy is set to allow USB Debugging, then users or IT administrators can enable this feature for app development or troubleshooting purposes. However, due to potential security risks, it's generally recommended to keep this feature disabled when not in use.
2Steps to Set Up the "USB Debugging" Policy
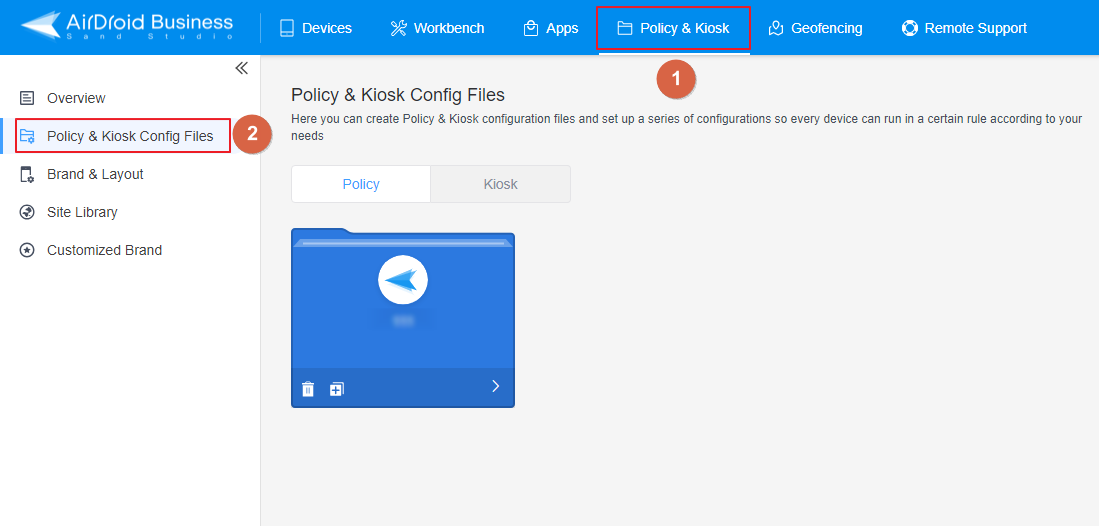
- Step 1Access Policy Setting
- Log into Admin Console, navigate to the "Policy & Kiosk" Section on the dashboard, and click "Policy & Kiosk Config Files".
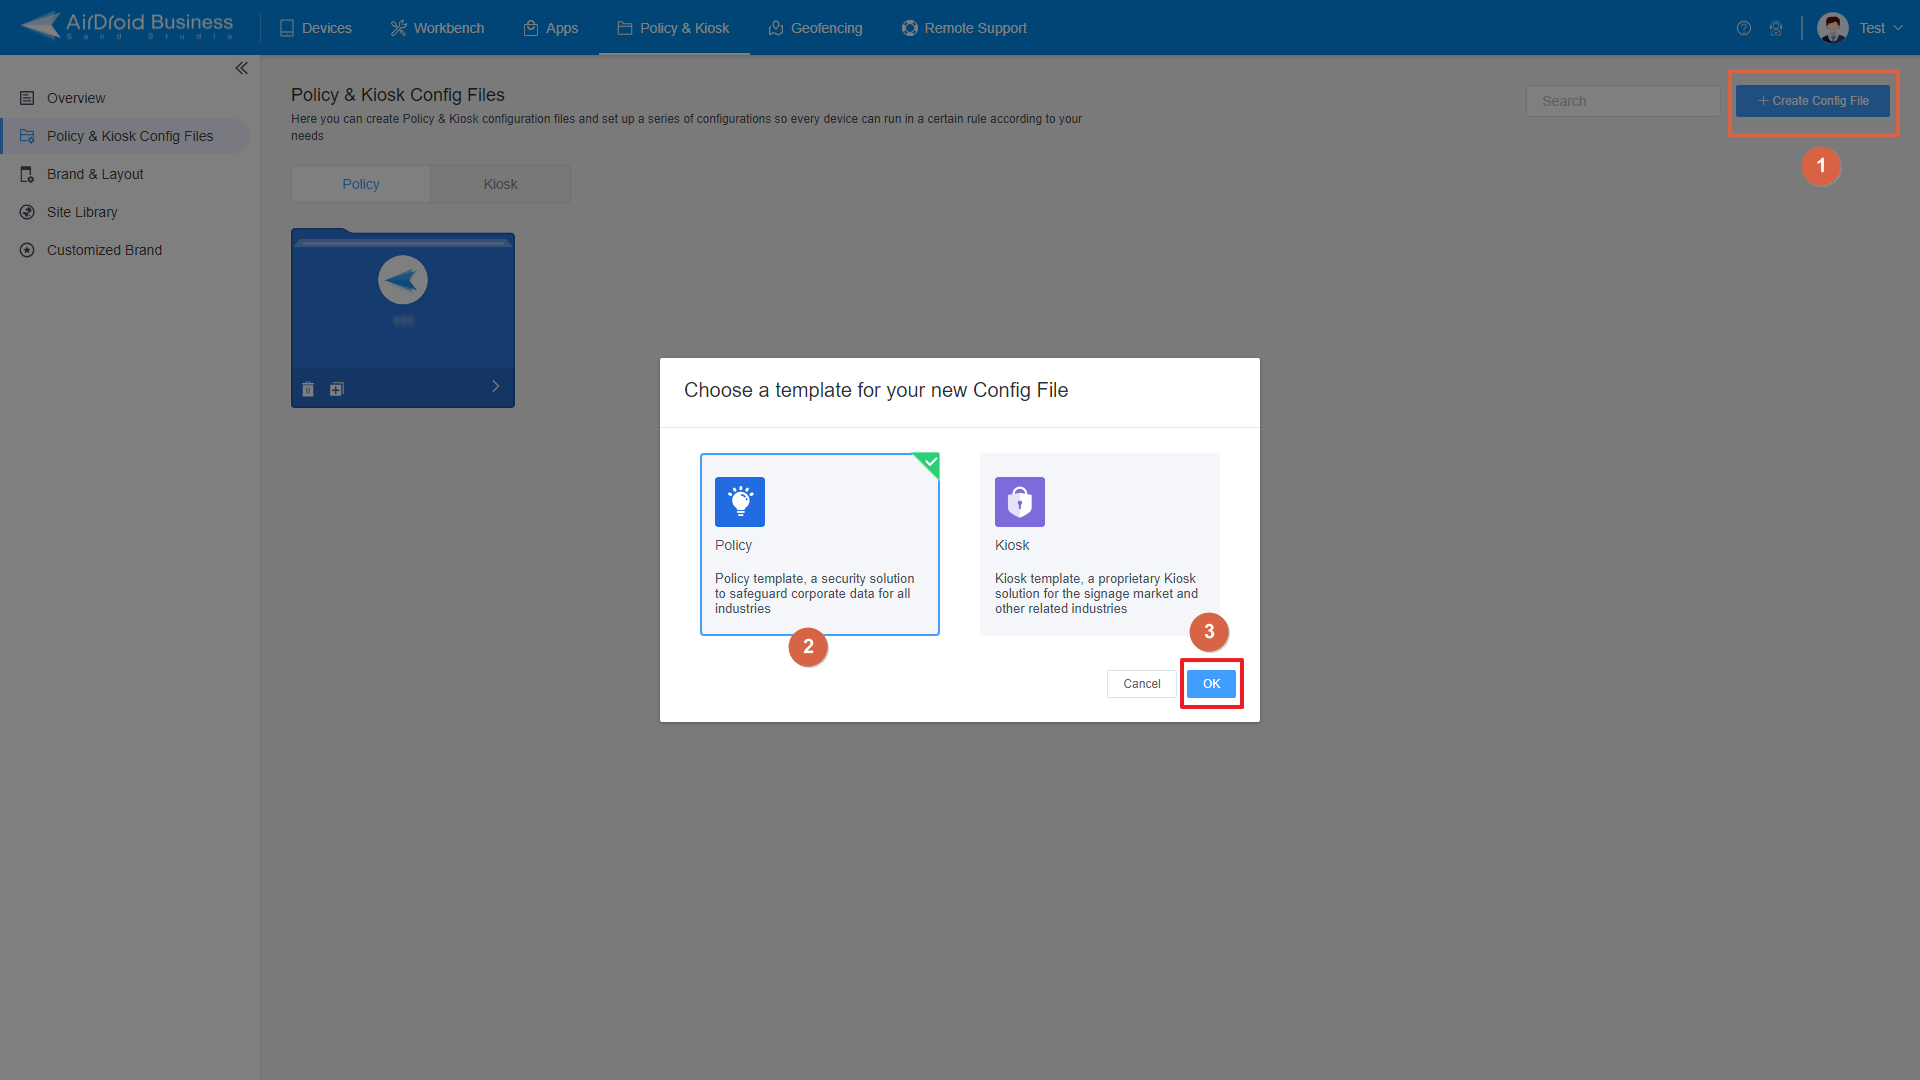
- Step 2Create or Edit a Policy
- LIn this section, you have the option to either create a new policy or modify an existing one.
- ● To create a new policy, click on "+Create Config File", choose "Policy" and then click "OK" on the pop-up.
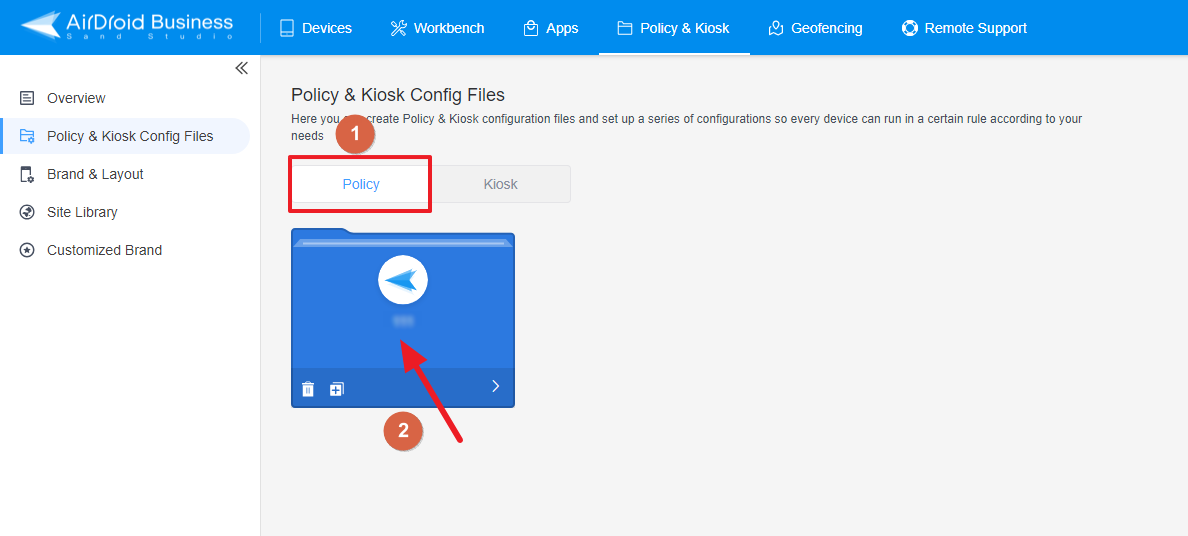
- ● To modify an existing Policy, switch to the "Policy" tab, select the Policy File you want to modify.
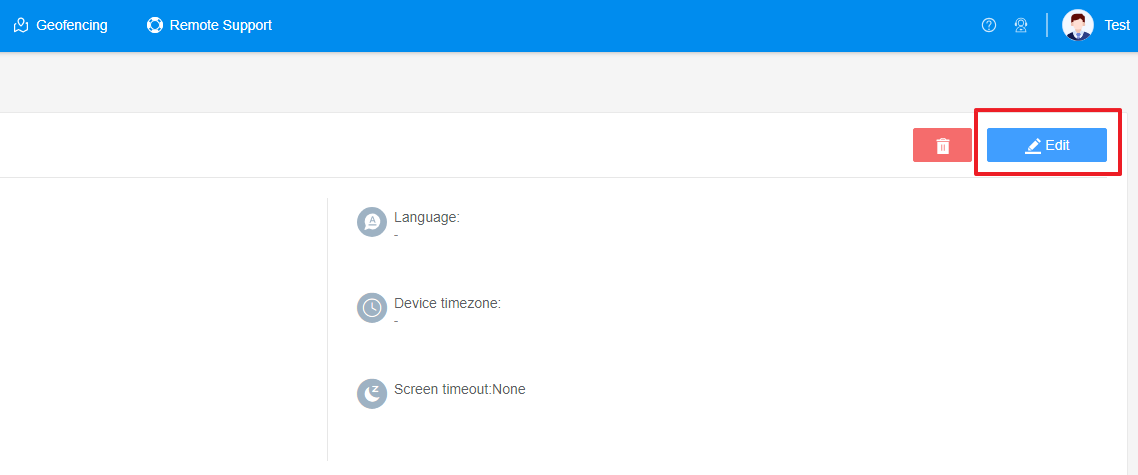
- Click on the "Edit" Button in the top right corner. On the following page, you can set all kinds of limitations and settings for your config file.
- Step 3Access the "USB Debugging" Policy Setting Section
- Click on [Restrictions], and find the "Safety" section.
- As mentioned above, USB Debugging is a developer option. Therefore, you can only configure usb debugging by enabling developer mode.
- Turn on the switch on the right of Developer Mode, and the "USB Debugging" Policy Setting will appear.
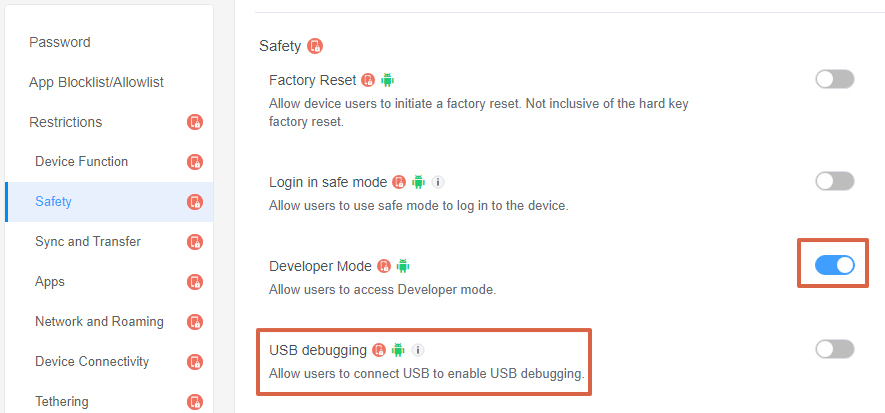
- Step 4Set up the "Develop Mode" Policy
- ● To allow users to use USB Debugging, turn on the switch on the right.
- ● To disable users to use USB Debugging, turn off the switch on the right.

2. These settings only take effect when AirDroid Biz Daemon has the Device Owner permission on the device.
- Step 5Save and Apply the Policy
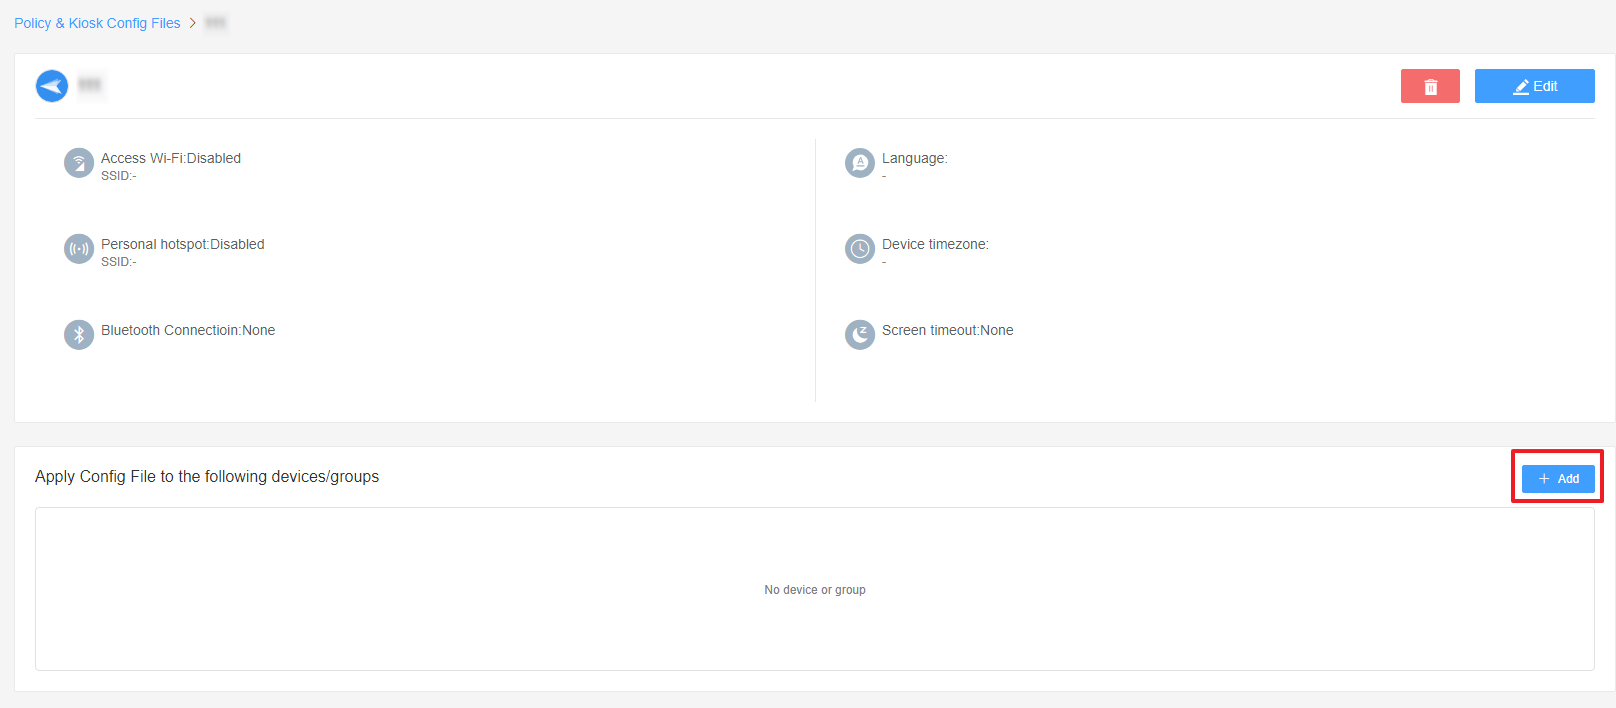
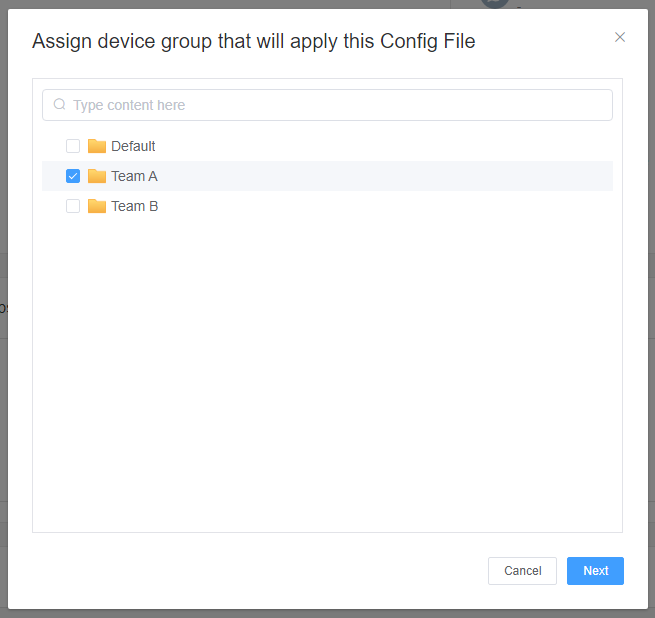
- After setting up the "USB Debugging" Policy , click "Save" button on the top right corner.
- Then, return to the Policy Management section, select the policy you created or edited, find the [Apply Config File to the following devices/groups] and click [+Add]. Choose the devices or groups you want to apply the policy to and confirm.

Congratulations! By following the steps above, you can successfully set up and apply USB Debugging Policy according to your business needs. This not only helps in maintaining data security but also in managing your devices more efficiently.
Still need help? Submit a request >>
Related Articles
- How can I set up password rules with Android Password Policy in AirDroid Business?
- How to implement App Blocklist/ App Allowlist on AirDroid Business?
- How can I control camera access using Camera and Lockscreen Camera Settings in AirDroid Business?
- How do I manage Microphone Permissions in AirDroid Business?
- How can I ensure data security with Mandatory Storage Encryption in AirDroid Business?
You May Also Like
- How to use App Allowlist for Kiosk Mode in AirDroid Business?
- How to Set up Kiosk Website Allowlist on AirDroid Business?
- How to set up Kiosk Browser Settings on AirDroid Business?
- How do I Customize the Kiosk Brand within AirDroid Business?
- How to Modify My Brand and Layout in Kiosk Mode of AirDroid Business?